Cover image: Yavimaya Iconoclast by Caio Monterio
In my recent Top 10 list, I briefly touched on how I believe Green-Red Aggro is the best deck in Dominaria United draft. Today, I will explain my reasoning.
I consider Green-Red Aggro the most consistently powerful deck in the format. I’ve played more than 200 games of DMU limited, and this is the conclusion I’ve reached: There is no perfect deck. There are always corner cases, and there is always variance. No matter how well you draft, and no matter what cards you open, there are games you cannot win and drafts you cannot trophy. Even so, the way to maximize your win percentage is to create as many situations as you can where victory is certain.
Since early in the format, I’ve had consistently above average performances with GR, even when the deck was missing any real bombs. What the deck lacks in individual card quality, it tends to make up for with redundancy, micro-synergies, reach (the concept, not the mechanic), and simplicity. With that in mind, we will first go over the commons and uncommons you want the most when drafting this deck.
Creatures

Sprouting Goblin appears banal at first glance, but what it lacks in immediate aggressiveness, it makes up for in sheer card advantage. While you can, and sometimes should, play it out on turn two, this goblin is best played turn three or later. In addition to just getting you an immediate card for your trouble, which can be a land that enables a kicker splash or off-color bomb, turning otherwise useless land drops into valuable new cards is an incredibly powerful ability for an aggressive deck.
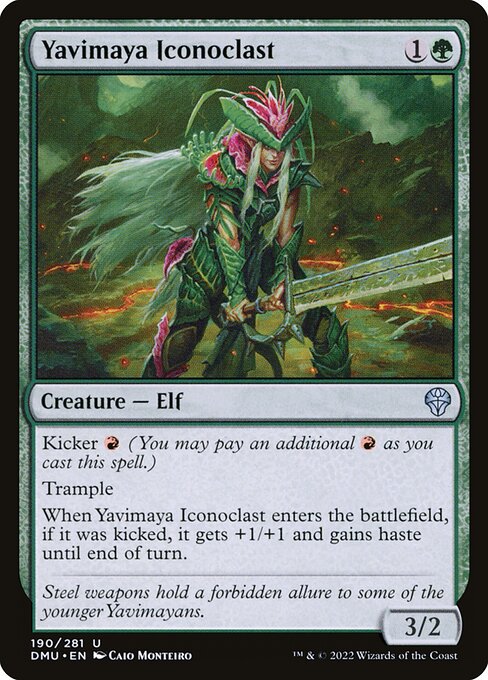
Another excellent card from the beginning of the game to the end, Yavimaya Iconoclast also has some excellent micro-synergies that help it push even further above other cards. Combat tricks and trample go together like cereal and milk. Although the premier combat trick in GR, Colossal Growth, can be kicked to give its target trample. It is nice that you get to accomplish multiple goals at the same time: the first goal being to win combat, and the second goal being to continue developing your board. Although this card is obviously stronger on turn three, you shouldn’t hesitate to play it if it’s the only two you’ve got in hand.
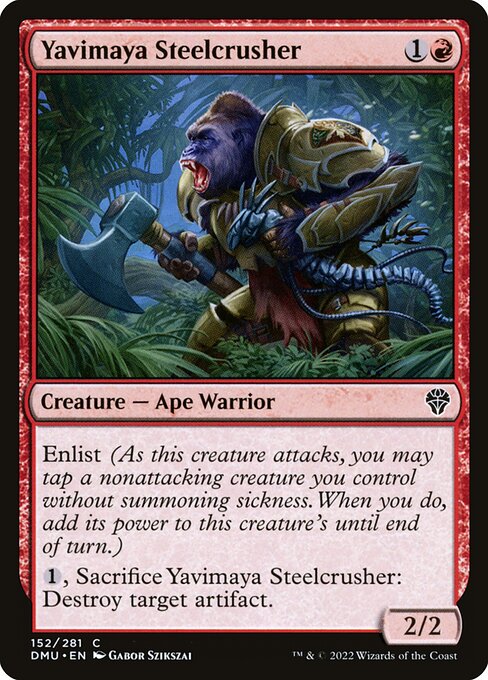
The most bread-and-butter style card of these decks, Yavimaya Steelcrusher tends to do much better than its meager power and toughness imply, thanks primarily to the enlist ability. While it is true that two toughness creatures with enlist often trade with anything your opponent has lying around, those trades don’t just go in one direction. Rather, it will often trade with anything your opponent has, including much larger and more expensive cards.
As an early play that maintains value throughout the game, it often performs well and is a card I look to obtain in multiples. Additionally, the power boost from the enlist ability helps you cash in your more situational removal spells (Bite Down and Tail Swipe) for bigger and better creatures than average, meaning you don’t have to play clunky and expensive creatures to deal with your opponent’s beefiest threats and potential blockers.
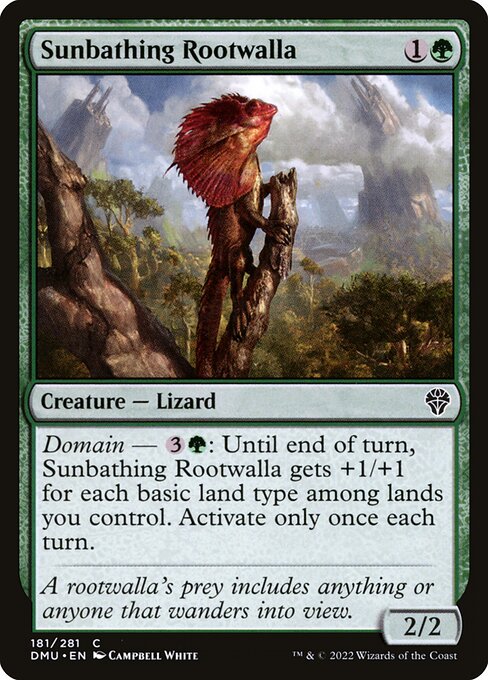
You might be sensing a theme in creatures you can play on turn two that stay relevant further into the game. Well, Sunbathing Rootwalla definitely fits that theme. Although you’re looking to have a pretty tight set of lands (often 16), getting +2/+2 or occasionally +3/+3 is still quite a boon. Additionally, the same boost towards fight-based removal that Yavimaya Steelcrusher has, Rootwalla maintains, albeit at a higher premium on average.
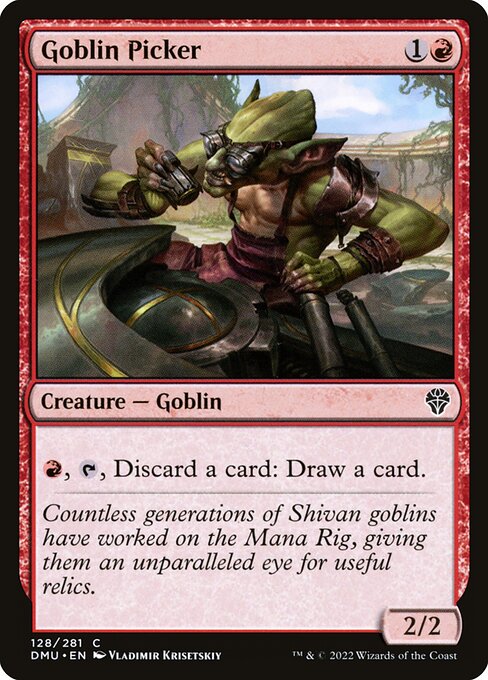
At this point I probably don’t have to spell it out, but Goblin Picker is another two that holds relevance is exactly what this deck wants. Most of my decks have upwards of eight or more two-mana creatures, and a high density of playables at common ensures that you’ll rarely be without some number of them.
For his part, the Picker plays a similar role to the Sprouting Goblin, with the caveat that you’ll be discarding useless lands most of the time rather than sacrificing the ones you have in play. While your opponent draws their eighth land for the game, you’ll be pitching anything past land number five to draw another creature, removal spell, or combat trick to help finish the game!
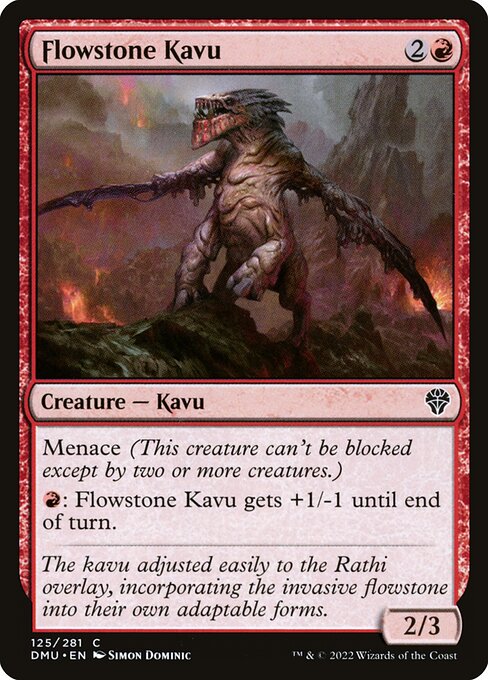
With the most powerful twos out of the way, the premier three comes into focus here. I underrated Flowstone Kavu early in the format, but it has performed better than I could have hoped. Your aggressive curve and high creature count means that even on turns where your opponent can trade, they often don’t want to trade for this. Additionally, the pump ability discourages double-blocks and works extremely well with Bite Down. Since some of the earlier two-mana plays can be cast on turn three for a bonus, the need for threes is lower than you’d expect, but this is likely the best one.
While Bog Badger is often just a 3/3 for three mana, the kicker ability is relatively easy to splash and the benefit is sizable. There are many situations where you’ll tend to stall out when your opponent hits about 3-8 life, and giving all of your creatures menace is a surefire way to get in damage against most decks. This is one of the two main splash pathways you’ll take with this deck. The other comes next.
Keldon Strike Team hits hard, regardless of whether or not it is kicked. While it does suffer from having 1 toughness, it can be enlisted, and high power works well with Bite Down. Much like the Badger above, it can be kicked with some work. At the worst of times, the Strike Team is bad against the decks you’re already less good against, but not every card can be a smash hit.
Pretty much the only four mana creatures you’re looking to play below rare are Coalition Warbrute and Dragon Whelp. The Whelp is, on average, going to deal more damage to your opponent, but the trample/enlist combo on Warbrute can’t be written off. Although you don’t want very expensive cards, playing 2-3 of these will make sure you’re able to compete with decks that survive the onslaught of smaller creatures.
Removal
Bite Down and Tail Swipe occupy a similar space. While other decks might be worried about not having a good enough creature count to justify the inclusion of these cards, a proper build of this deck should never ever have to ask that question. Additionally, the relative low cost of these spells is excellent in a deck that has cheap or even built-in ways to increase the size of its creatures, such as combat tricks, enlist, or activated abilities.
Lightning Strike and Flowstone Infusion are more traditional removal spells. Infusion plays quite well in a deck loaded with aggressive two mana plays, as you can play out another creature on turn three while also paving the way for attacks by dispatching a potential blocker. Lightning Strike is versatile enough to finish a race by targeting your foe’s face, and strong enough to blast down many of the commons and uncommons in the format for a very low cost.
Jaya’s Firenado, while it has a great name, is very expensive and not very impressive. At most, I occasionally play one of these when my deck is looking a bit clunkier and more expensive that I had initially hoped. Aim to play less of these. While it might seem strange to give up removal, consider that every single creature that would die to the Firenado will also die to any attacking creature with any of the premier combat tricks this deck is hoping to use. If you can do for one, two, or three at instant speed what this card does at sorcery speed for five, why would you ever choose this?
Tricks
Colossal Growth and Furious Bellow are the premier combat tricks in this deck. Although they both have their uses, you will often want to steer towards Growth rather than Bellow due to the kicker on Growth giving trample, an ability that pushes through damage while also winning combat. Make no mistake, Bellow is certainly powerful, but there are times where it won’t quite get the job done, especially against certain opposing tricks.
In Thrall to the Pit is the card you’re hoping to play last, often when your opponent plays their biggest creature. If you play your cards right and draw decently, this card can kill your opponent very often. A combat trick here, a removal spell there, some trades elsewhere, and your opponent thinks a 5/5 might stymie the tide of aggression. Unfortunately for them, you’ll sometimes be waiting with one of these, and suddenly their blocks look horrendous. I don’t think you should play more than one of these.
While this list wasn’t exhaustive, it should provide you with enough context to make decisions on which cards are and aren’t worth playing in this deck. I left out strong playables like Viashino Branchrider, Phoenix Chick, Hurloon Battle Hymn, and many more, but that is not necessarily a reflection of their power level so much as it is respect for your time.
Drafting/Piloting Strategy
Like any archetype in the format, you should only be drafting Green-Red Aggro if it is open. Generally, you’ll still want to start with bomb rares in either red or green, preferably cheap ones, and move on from there. However, sometimes you’ll just notice an uncommon that shouldn’t be there, or a lot of solid twos moving around the table that shouldn’t be. Did a Yavimaya Steelcrusher and Bite Down wheel in a pack that seemed pretty average? Perhaps the deck is open.
What you should not do is commit to the deck from the outset and try to force it. While there are many playable cards at almost every mana cost for this deck, you can still be at a table where two other players are competing for green or red cards and come up very short. Believe me, the fail case for this deck is not pretty.
At the end of your draft, you’re looking to have about 16 lands, which leaves you 24 slots to work with, and I believe 17 or so of those should be creatures. The remainder should be your best removal, followed by combat tricks. Do not concern yourself with obtaining the very best creatures, but with obtaining many of them. If you have to choose between your third removal spell or a marginally better creature than one you already have in pack three, just take the removal spell.
Once you’re in game, try not to give your opponent room to breathe. Many decks are trying to set up complicated board states with multiple creatures and specific combat tricks. Do not let them. Smother them with aggression and make every play they make seem like a desperate bid to hold you back, and when they think they might be in the clear, let them know how wrong they are. Push damage through quality creatures with combat tricks and removal. Trade off your less important cards. Know when to sandbag threats, and know when to push the pace. Drafting is 70% of this deck, and playing is the other 30%.
Conclusion
If you follow the above advice, you will hopefully recognize when this deck is open. When it is open, you will win many games off the strength of pure aggression if your opponent stumbles even a bit. The ceiling is sky high, and the floor is not that low. I hope that you’ve found some value within this guide, and that you enjoy seeing your opponents lose with 3-5 cards in hand.
Hi, I’m Luka “Robot Rallis” Sharaska, but most people just call me Robot. I earned my name by having a monotone voice, a mind for calculating odds, and a calm demeanor at nearly all times. Most days, you’ll find me in the gym or creating content for my YouTube channel: Robot Rallis.

